

I had the honor some months ago to room with Dr Henry Best, OP while attending Royal University of the Midrealm. I carefully listened and learned from him, his stories and his thoughts. When the opportunity came to do his scroll for the Order of the Laurel, I jumped at the chance. Trick was, he didn’t know it was coming.
I had such plans for this scroll. I spent more than 40 hours working on this before I did the final finished project. And I had some set backs. The biggest and most important one being that I went to the Emergency Room with chest pains that went down my left arm and up the left side of neck. I didn’t have a heart attack and I’m still seeing doctors trying to figure out what is going on with my heart. Long story short, due to time lost I wasn’t able to do everything I wanted so I changed things on the quick and created what you see here.
I have had requests to do a step by step walk through of creating a scroll. These are the steps I used for this project and they are applicable to other scroll projects though choices may vary.
I worked on calf velum.
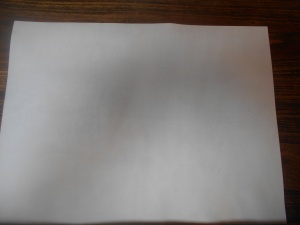
Calf Velum 12″ by 16″ (30.5 cm by 40.6cm)
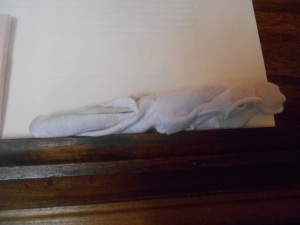
Then I pounced it using gum sandarac in a muslin bag.
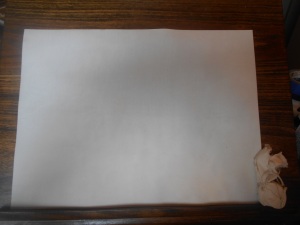
Pouncing finished. For now.
Next I blocked out the text block.

Text Block corner and the handy lead/tin pencil that drew it.
After that I pricked down one side of the text block at 6 mm apart. Then using a square I drew lines across again using the lead/tin pencil
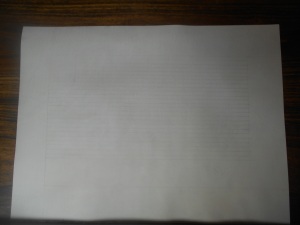
Text Lines put in.
I set aside some space for the illuminated initial.

The block set aside for the Illuminated Initial.
The illuminated initial needed to have the foundation put down first. This is one of the things I changed. I was going to use a gesso and rabbit hide glue base for the gilding. I simply did not have the time to soak it and prep it and lay it down and let it set and then polish and gild. Instead I used kohlner miniatum ink

Kohlner Miniatum Ink for the base.
For my gold I used:
Book of Gold Leafing
To do the gilding work I used my hematite dog tooth burnisher. So named because it is shaped like a dog’s tooth.

Hematite dog tooth burnisher
You want to keep your burnisher clean and free from defects. Oily or rough burnishers can cause a lot of problems. I keep mine stored in a cotton glove.
Stored burnisher.
I took out one leaf of gold from the packet. I had a sheet that wasn’t completely used from a previous project so I used that first.

Partly used gold sheet.
As you can see the shape of the gold left on this sheet is roughly in a shape that would over the “P” very well.
A whole sheet of gold looks like:

Gold leaf before it is used.
The amount of gold on a sheet is immensely small. Gold can be rolled down to a few molecules thick ( I don’t know how thick this is.) This gold is very thinly rolled. Breathing normally can blow it around and handling it directly with your hands can make it disintegrate entirely.
To use the gold you turn the sheet over and press it onto the gilding base:

Putting down the gold is often called, “Laying down the gold/gilding”
I use my burnisher to press the gold onto the gilding base. I simply press on the back side of the sheet where there is not gold. I run the burnisher along the area where the gilding base is. This helps ensure the gold sticks to the base. Of course the gold not stuck to the base will come off too.
Then you do some clean up moving the excess gold onto the gilding base, in this case the letter of the P. I apologize the focus was off on my camera so I don’t have any clear pictures of this but the following pictures gives an idea of being in the middle of that process.

Gilding Clean-up
I use my burnisher to do the initial clean up.

Using the burnisher to clean up the gilding.
I lift and push the gold to the areas where the base is. I then press it down into the gold that is already there. Gold likes to stick to gold helping the process along. Every person I know that does gilding talks about not breathing while doing this process. Obviously we have to breath or we would pass out and that would be bad. I have learned to control my breathing keeping it very controlled and with as little force as possible. I originally tried breathing though my nose but found that was too focused and forceful. You want as little air movement as possible when doing this.
Even being very careful gold flakes are going to get loose. Gold likes to stick to everything really so this is why gilding was supposed to be done first before writing and before painting decoration.

The clean-up of the “P” is coming along nicely. So are the gold crumbles!
This is mostly finished but you can see the gold has moved around a bit. I used a clean light brush to move the gold bits around and then put them into a container to make them into shell gold later.
After doing that I put down a sheet from the gilding book with no gold on it and put the gilded area onto a gilding pad. It is a block of wood with leather over the top that has a soft filling between the wood and the leather. Then I place the sheet down and use the burnisher to rub the gold over and over again. Then I take off the sheet and very very gently use the burnisher to burnish (shine) up the gold every so slightly more.
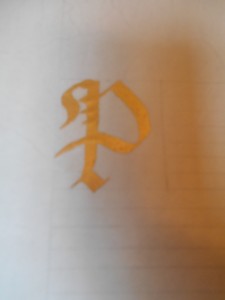
Cleaned up and looking good. Gilded P.
But that is just the illuminated initial. And you can see from this picture why it is called illuminated. The gold looks like it is shining its own light not just reflecting it.
I also gilding Dr. Best’s name:

Henry Best Gilded.
And I gilded “Order of the Laurel”
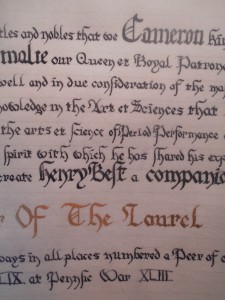
Order of the Laurel gilded.
The full scroll:

Word text and illuminaton to complete the scroll.
The lines were purposefully left in. Every single Patent of Arms I have seen from this time period has the lines in it. You may notice the names of their Majesties Midrealm are larger than the text and in Gothic Textura Quadrata. This seems to have been the period practice in Elizabethan England. The rest of the text is in a Gothic Littera Bastarde also a period practice for time period as was putting the name of the recipient in the larger sized script. The black text is written in iron gall ink.
I really enjoyed working on this scroll and I only regret that something happened that made it impossible for me to do everything I wanted for it. Dr Henry Best truly is one of the best people I know in the SCA and he truly cares about those around him and the performers he has been working with and teaching.
Congratulations Dr. Henry Best.
